Core legal skills
How to format contracts and other legal documents
Six Microsoft Word functions that make legal documents faster and more consistent to format: Styles, automatic cross-references, formatting marks, the format painter, keep-with-next, and paste options.
The short version
Six Microsoft Word features make legal formatting faster and more consistent: Styles for consistent headings and paragraphs, automatic cross-references that update themselves, formatting marks to reveal hidden errors, the Format Painter to copy styling, 'Keep with next' to stop headings stranding at the bottom of a page, and paste options to control formatting when you copy text in.
As a junior lawyer, document formatting is something you're expected to do well — and it really sticks out when it isn't. Here are six Microsoft Word functions that help you format legal documents faster and more consistently.
1. Styles
Learning to use Styles properly has saved me a huge amount of time. Styles hold pre-set formatting you can apply to headings, paragraphs and lists for a consistent look.
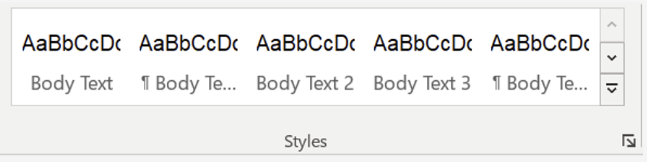
A. Using pre-set styles
- Select the text you want to apply a Style to.
Find the Styles — the gallery in the Home tab, or the Styles pane (the arrow at the bottom-right of the gallery).
- Click the Style you want to apply.
B. Modifying a style
- Select sample text with the formatting you want.
- Right-click the Style to amend in the Styles pane or gallery.
- Select "Update [Style] to match selection".
C. Creating a new style
- Format sample text to the style you want to create.
- Select the formatted text.
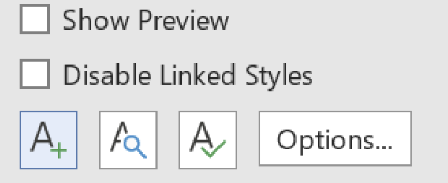
Home → Styles → Styles pane → New style (the A+ icon, bottom-left).
2. Automatic cross-references
Use automatic cross-referencing so you don't have to manually update references every time you amend the contract.
A. Insert a cross-reference
- Alt+C, or the Reference tab → Cross-reference.
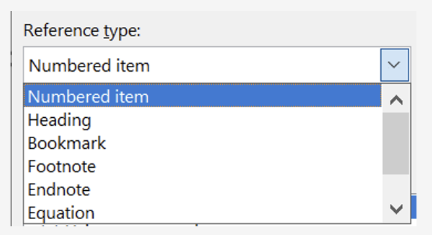
Choose the reference type — usually "numbered item" for clauses, occasionally "Schedules".
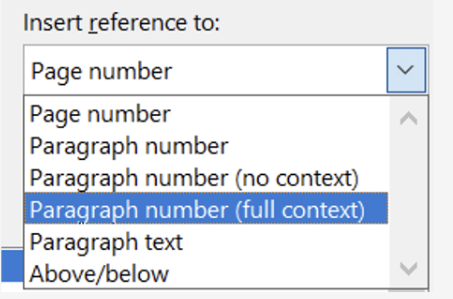
Under "Insert reference to", select "paragraph number (full context)" to capture all numbering, e.g. "5.1(a)" instead of just "(a)".
B. Update cross-references
Select all (Ctrl+A), then press F9.
C. Check for broken references
References can break — for example, if you delete the referenced clause. Do a word search (Ctrl+F) for "error", "Clause 0" or "Clause 1.1" to spot them.
D. Jump back to where you clicked
After clicking a cross-reference, toggle back (Alt+Left) and forth (Alt+Right) instead of scrolling back to the source.
3. Formatting marks
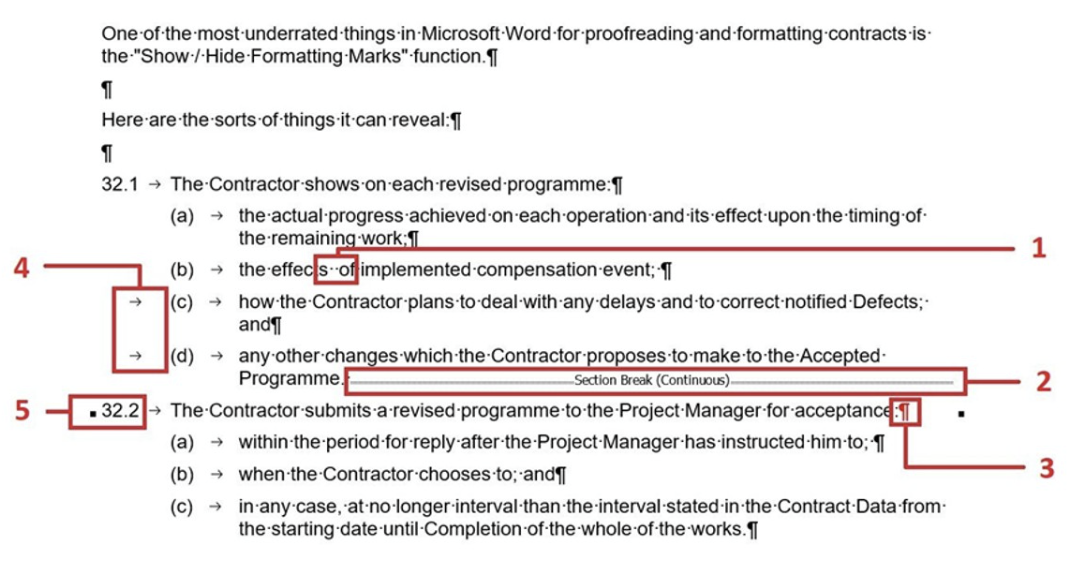
Show / Hide Formatting Marks reveals things like:
- Space marks — spotting unnecessary double spaces.
Section / page / column breaks — where they shouldn't appear.
Paragraph marks — where paragraphs have accidentally been joined while editing.
Tab marks — manual formatting where numbering should be automatic.
Anchor marks — where text is set to stay on the same page as the previous text.
Turn the view on with Ctrl+Shift+8 (or Cmd+8 on Mac).
4. Format Painter
To quickly copy formatting from one part of the document to another:
- Select the text you want to copy the style from.
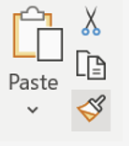
- Click the Format Painter (paintbrush) in Home, or Ctrl+Shift+C.
- Click the text you want to apply it to, or Ctrl+Shift+V.
Double-click the paintbrush to apply the copied style multiple times.
5. Keep with next
For contracts, headings should stay on the same page as their operative clauses. To keep them together:
- Select the heading.
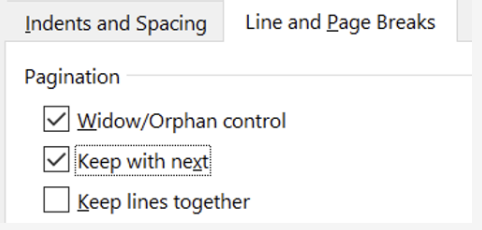
- Right-click → Paragraph.
- Select the "Line and Page Breaks" tab.
- Tick "Keep with next".

Bonus: set the heading's style to "keep with next" so all headings in that style do it automatically.
6. Paste options
Instead of a plain Ctrl+V, right-click where you want to paste to bring up the paste options:
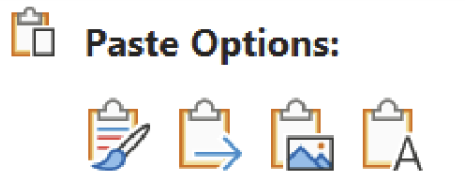
Keep Source Formatting — retains the copied text's original fonts, colours and styles. Use when you want it to look exactly like the source.
Merge Formatting — adapts to the destination's formatting while keeping basic bold / italic. Use when you want it to blend but retain some formatting.
Keep Text Only — strips all formatting and hyperlinks, taking on the destination's formatting.
You can set your default at File → Options → Advanced → "Cut, copy and paste". I use "Keep Text Only", because I usually want copied text to match its destination rather than keep its original formatting.
Frequently asked questions
How do I stop cross-references breaking when I edit a contract?
Insert them as automatic cross-references (Alt+C), choose 'paragraph number (full context)' so they capture the full numbering like 5.1(a), and update them all with Ctrl+A then F9. Search for 'error' or 'Clause 0' to catch any that broke.
How do I keep a heading on the same page as its clause in Word?
Select the heading, right-click → Paragraph → the 'Line and Page Breaks' tab, and tick 'Keep with next'. Set it on the heading's Style and every heading in that style will do it automatically.
Which Word paste option should I use for legal documents?
'Keep Text Only' strips all formatting so pasted text matches its destination — usually what you want in a contract. 'Merge Formatting' blends in but keeps basic bold/italic; 'Keep Source Formatting' preserves the original look. Set your default at File → Options → Advanced.
Part of the Field Guide
This is 1 of 110+ guides
The full library adds templates and learning tracks — one payment, lifetime access.
Get the next guide in your inbox
One short, practical email most weeks. No spam — unsubscribe any time.